本文最后更新于 2022-08-14,文中内容可能已过时。
1 React安装 首先安装Node.js
, 安装后将npm添加到环境变量中
Node.js算是一个Javascript的运行环境,npm则是类似于一款包管理器。需要注意的是,npm安装的包默认是项目级的,也就是会将包安装到当前路径下的node_modules文件夹中,并非像pip一样安装到全局
npm常用指令如下:
1
2
3
4
5
6
npm start # 运行项目
npm install packageName # 安装包(到当前路径)
npm install -g # 安装包(到全局)
npm run build # 编译项目,生成静态文件并放到./build路径下
npm config set proxy = http://127.0.0.1:7890 # 配置代理
npm config set https-proxy= http://127.0.0.1:7890 # https代理
之后创建新app
1
2
3
npx create-react-app my-app # my-app 可修改为任意名称, npx是npm5.2+附带的package运行工具
cd my-app
npm start                   # 运行app
此时,访问localhost:3000看到app的页面,则安装完成
2 React基础概念 2.1 语法 React采用的是JSX语法,这种语法的特点是在javascript代码中直接插入HTML代码,将多行HTML代码用圆括号 () 包裹即可(单行HTML可以省略括号)。如果需要在HTML代码中引用javascript的表达式,只需要将javascript表达式用花括号 {} 包裹即可。
1
2
3
4
5
6
7
8
function DivLink() {
const value = 1 ;
return (
< div >
< a href = "#" > this is link { value }</ a >
</ div >
);
}
return返回的值必须是一个完整的HTML元素,如下代码会报错
 1
 2
 3
 4
 5
 6
 7
 8
 9
10
11
function DivLink() {
const value = 1 ;
return (
< div >
< a href = "#" > this is link { value }</ a >
</ div >
< div >
< a href = "#" > link2 </ a >
</ div >
);
}
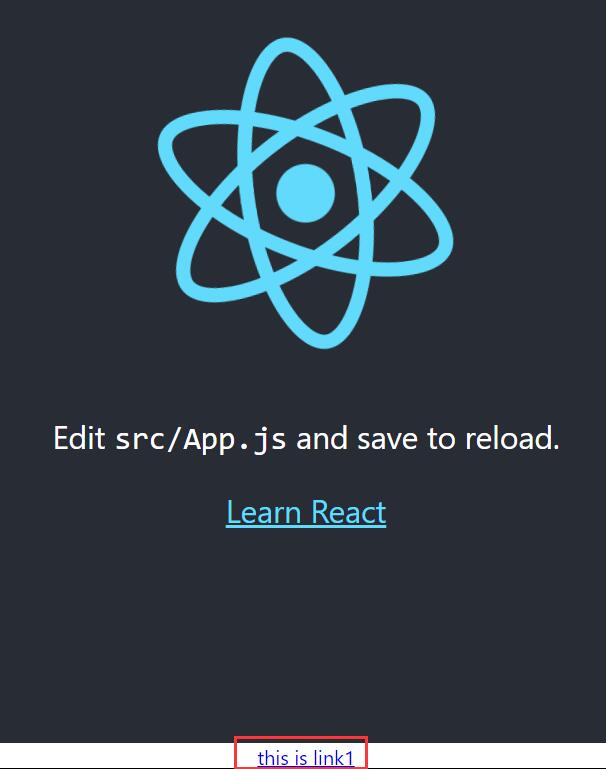
将上面的代码插入到 App.js 中,并执行npm start
 1
 2
 3
 4
 5
 6
 7
 8
 9
10
11
12
13
14
15
16
17
18
19
20
21
22
23
24
25
26
27
28
29
30
31
32
33
34
35
import logo from './logo.svg' ;
import './App.css' ;
function App() {
return (
< div className = "App" >
< header className = "App-header" >
< img src = { logo } className = "App-logo" alt = "logo" />
< p >
Edit < code > src / App . js </ code > and save to reload .
</ p >
< a
className = "App-link"
href = "https://reactjs.org"
target = "_blank"
rel = "noopener noreferrer"
>
Learn React
</ a >
</ header >
< DivLink /> { /* new added line */ }
</ div >
);
}
function DivLink() {
const value = 1 ;
return (
< div >
< a href = "#" > this is link { value }</ a >
</ div >
);
}
export default App ;
运行结果如下
执行结果 2.2 组件 组件是React中的最小管理单位。React中的组件有两种类型,一种是类(class)组件,一种是函数组件,组件的名称必须首字母大写,采用大驼峰命名。
阅读下面的例子,需要先了解Javascript的如下内容:
2.2.1 类组件 一个简单的类组件例子:
 1
 2
 3
 4
 5
 6
 7
 8
 9
10
11
12
13
14
15
16
17
18
19
20
21
22
class SpecialButton extends React . Component {
constructor ( props ) {
super ( props );
this . state = {
click : 0
}
}
handleClick() {
alert ( 'Hello world!' );
this . setState ({ click : this.state.click + 1 });
}
render() {
return (
< div >
< button onClick = {() => this . handleClick ()}> Click </ button >
< p > The button has been clicked { this . state . click } time </ p >
</ div >
);
}
}
这个例子中包含了类组件中的常用功能:状态变量和事件处理函数。一个类组件最基本的结构为:
1
2
3
4
5
6
7
8
9
class ComponentName extends React . Component {
constructor ( props ) {
super ( props );
}
render() {
return (< div ></ div >);
}
}
constructor函数是类的构造函数,主要用于给类的状态变量赋初始值,参数props是组件的属性。例如,<ComponentName myProp="prop"></p>, 此时构造函数接收的props参数会是{myProp: "prop"}对象。注意此处的super函数不可省略,需要构造基类。render函数是渲染函数,用于渲染最终显示的内容对于状态变量,必须通过setState方法来更新,才能触发重新渲染组件的流程。
对于事件处理函数,此处button的onClick属性为React内置的事件属性,我们为该属性赋值,即可在点击按钮时触发对应的代码,事件属性的值必须是一个函数。之所以这里使用箭头函数,是因为箭头函数中没有this, 此时this仍然会指向class本身,便于我们访问class的状态变量以及成员函数。
对于setState使用不当,可能产生预期之外的结果,常见的一种错误:
 1
 2
 3
 4
 5
 6
 7
 8
 9
10
11
12
13
14
15
16
17
18
19
20
21
22
23
class SpecialButton extends React . Component {
constructor ( props ) {
super ( props );
this . state = {
click : 0
}
}
handleClick() {
alert ( 'Hello world!' );
this . setState ({ click : this.state.click + 1 });
this . setState ({ click : this.state.click + 1 });
}
render() {
return (
< div >
< button onClick = {() => this . handleClick ()}> Click </ button >
< p > The button has been clicked { this . state . click } time </ p >
</ div >
);
}
}
此时点击一次,并不会让click计数器加2,这是因为React会优化setState的调用,可能会把多个 setState() 调用合并成一个调用。要实现上面的功能,可以给setState传一个函数。
将handleClick修改成下面内容
1
2
3
4
5
handleClick() {
alert ( 'Hello world!' );
this . setState (( state ) => ({ click : state.click + 1 }));
this . setState (( state ) => ({ click : state.click + 1 }));
}
此时就可以实现一次点击增加两次。
根据个人实践,用到这种方式的情况很少,所以更简单的办法就是在设计模块和事件的时候,避免在一次事件处理中调用多次setState。
同理,如果setState的时候,需要同时用到state和property,也会出现上面的情况,因为state和property的更新是独立的。解决方案也和上面一样。
2.2.2 函数组件 函数组件的核心概念和类组件相同,只是函数组件里的状态变量需要通过hook
创建
 1
 2
 3
 4
 5
 6
 7
 8
 9
10
11
12
13
function SpecialButton() {
const [ click , setClick ] = React . useState ( 0 ); // 创建状态变量,以及对应的set函数,这里用到了解构赋值
const handleClick = () => {
alert ( 'Hello world!' );
setClick ( click + 1 );
};
return (
< div >
< button onClick = { handleClick }> Click </ button >
< p > The button has been clicked { click } time </ p >
</ div >
);
}
和上面class组件的setState函数相同,函数组件的状态也是异步更新的,所以上面提到的问题同样会出现。解决方案也是相同的,这里不再赘述,只放一个可行的例子。
 1
 2
 3
 4
 5
 6
 7
 8
 9
10
11
12
13
14
function SpecialButton2() {
const [ click , setClick ] = React . useState ( 0 );
const handleClick = () => {
alert ( 'Hello world!' );
setClick (( click ) => click + 1 );
setClick (( click ) => click + 1 );
};
return (
< div >
< button onClick = { handleClick }> Click </ button >
< p > The button has been clicked { click } time </ p >
</ div >
);
}
2.3 生命周期函数 React组件支持很多生命周期函数,这里我只学习了官方文档的简单例子
,在项目中使用了componentDidMount()函数,该函数会在组件挂载后执行一次,我在这个函数中发送ajax请求,用来初始化组件的某些值。
要在React应用中使用 jQuery , 只需要先安装(npm install jquery),再导入(import $ from 'jquery')即可.
 1
 2
 3
 4
 5
 6
 7
 8
 9
10
11
12
13
14
15
16
17
18
19
20
21
22
23
24
25
26
27
28
29
30
31
32
33
34
35
36
/* 使用jquery请求设置click初始值 */
class SpecialButton extends React . Component {
constructor ( props ) {
super ( props );
this . state = {
click : 0
}
}
componentDidMount() {
const initializeClick = ( value ) => ( this . setState ({ click : value }));
$ . ajax ({
type : 'get' ,
url : 'http://localhost:3000' ,
success : function ( response ) {
console . log ( response . length );
initializeClick ( response . length );
}
});
}
handleClick() {
alert ( 'Hello world!' );
this . setState (( state ) => ({ click : state.click + 1 }));
this . setState (( state ) => ({ click : state.click + 1 }));
}
render() {
return (
< div >
< button onClick = {() => this . handleClick ()}> Click </ button >
< p > The button has been clicked { this . state . click } time </ p >
</ div >
);
}
}
运行后,click的初始值应该和console的输出一致
2.4 Context 在React组件中,数据的流向是自上而下的。换句话说,如果下层组件需要上层组件的信息,需要通过props逐层传递。
 1
 2
 3
 4
 5
 6
 7
 8
 9
10
11
12
13
14
15
16
17
18
19
20
21
22
23
24
25
26
27
28
29
class A extends React . Component {
constructor ( props ) {
super ( props );
this . state = {
type : 'test' ,
};
}
render() {
return < B type = { this . state . type }/>;
}
}
class B extends React . Component {
constructor ( props ) {
super ( props );
}
render() {
return < C type = { this . props . type }/>;
}
}
class C extends React . Component {
constructor ( props ) {
super ( props );
}
render() {
return < button >{ this . props . type }</ button >
}
}
这段代码中,只有C用到了A提供的属性,但是中间有一层B,需要进行额外的传输工作。此时,可以考虑使用context。除此之外,context还可以用于存储多个组件共享的信息,比如当前用户的登录状态等。
 1
 2
 3
 4
 5
 6
 7
 8
 9
10
11
12
13
14
15
16
17
18
19
20
21
22
23
24
25
26
27
28
29
30
31
32
33
34
35
36
37
38
39
40
41
42
43
const TypeContext = React . createContext ( 'default value' ); // 使用createContext hook创建context
class A extends React . Component {
constructor ( props ) {
super ( props );
this . state = {
type : 'test' ,
};
}
render() {
return (
{ /* Context的Provider 会向下层提供value属性的值来作为该Context的值*/ }
< TypeContext.Provider value = { this . state . type }>
< B />
</ TypeContext.Provider >
);
}
}
class B extends React . Component {
constructor ( props ) {
super ( props );
}
render() {
return < C />;
}
}
class C extends React . Component {
constructor ( props ) {
super ( props );
}
static contextType = TypeContext ; /* 使用TypeContext作为自身的context属性*/
render() {
// 这里会寻找(嵌套层次)最近的TypeContext的Provider的值
return < button >{ this . context }</ button >
}
}
// 函数式组件可以通过useContext hook 使用Context
function D() {
const context = React . useContext ( TypeContext );
return < button >{ context }</ button >;
}
执行上述代码,最终可以渲染出包含test文字的按钮。
对于需要在使用context的组件中,对context修改的情况,可以通过将Context视作一个对象,在该对象中添加修改context的方法来实现。
参照上面的例子:
 1
 2
 3
 4
 5
 6
 7
 8
 9
10
11
12
13
14
15
16
17
18
19
20
21
22
23
24
25
26
27
28
29
30
31
32
33
34
35
36
37
// 将Context的默认值修改为包含两个属性的对象
const TypeContext = React . createContext ({ value : null , setValue : null });
class A extends React . Component {
constructor ( props ) {
super ( props );
this . state = {
type : 'test' ,
};
}
render() {
const contextValue = {
value : this.state.type ,
setValue : ( newValue ) => this . setState ({ type : newValue }),
};
return (
< TypeContext.Provider value = { contextValue }>
< B />
</ TypeContext.Provider >
);
}
}
class B extends React . Component {
constructor ( props ) {
super ( props );
}
static contextType = TypeContext ;
render() {
return (
{ /* 调用context对象的setValue方法,实现对A组件的state的修改,
进而修改Context的值,重新渲染子组件 */ }
< button onClick = {() => this . context . setValue ( 'new value' )}>{ this . context . value }</ button >
);
}
}
添加A组件,会显示一个按钮,点击按钮,会将按钮的内容修改为’new value'
对于需要多个Context的值的情况,需要使用Consumer,这里演示Consumer的使用方法,多个Context的样例可以参考官方文档
 1
 2
 3
 4
 5
 6
 7
 8
 9
10
11
12
13
14
15
16
17
18
19
20
21
22
23
24
25
26
27
28
29
30
31
32
33
34
35
36
37
38
39
40
const TypeContext = React . createContext ({ value : null , setValue : null }); // 使用createContext hook创建context
class A extends React . Component {
constructor ( props ) {
super ( props );
this . state = {
type : 'test' ,
};
}
render() {
const contextValue = {
value : this.state.type ,
setValue : ( newValue ) => this . setState ({ type : newValue }),
};
return (
< TypeContext.Provider value = { contextValue }>
< B />
</ TypeContext.Provider >
);
}
}
class B extends React . Component {
constructor ( props ) {
super ( props );
}
render() {
return (
< TypeContext.Consumer >
{ /* Consumer的子元素需要是一个函数,该函数接收Context的值作为参数,返回需要渲染的HTML结果*/ }
{
context => (
< button onClick = {() => context . setValue ( 'new value' )}>{ context . value }</ button >
)
}
</ TypeContext.Consumer >
);
}
}
3 React开发相关库 目前,我主要使用了rsuite
作为组件库,使用react-router v6
作为前端路由库,使用react-chartjs-2
作为图表展示工具。
相关库的使用方法参考文档,后续有时间会在这里补充
4 React部署 Create-react-app默认配置了webpack等内容,目前我主要为默认配置,仅修改了prebuild, postbuild等hook,这部分还有待研究。
常规的部署流程为
之后,在build路径下就会生成index.html,以及对应的static文件,将index.html和静态文件拷贝到对应的后端即可。
如果使用了react-router,那么要正确区分前端路由和后端路由。对于任意一个前端路由,后端都需要返回index.html文件,这是因为前端路由的实现组件是在index.html中的,如果后端不返回index.html文件,react-router无法正常工作